Who could forget those wild Monsters like Wild Child, MrGasser, Junkyard Kid, Mother's Worry, etc...? Share your Monster memories, pictures, toys, models, decals, shirts, etc....
Moderator: weldonmc
-
weldonmc
- Posts: 237
- Joined: Sun Feb 06, 2005 8:19 pm
Post
by weldonmc » Mon Jun 29, 2009 1:40 am
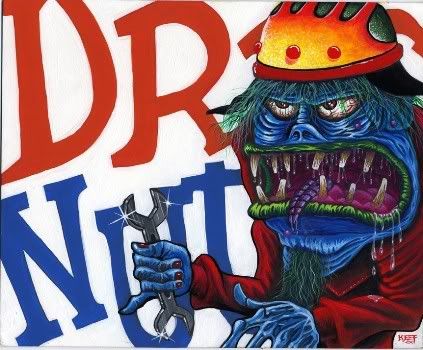
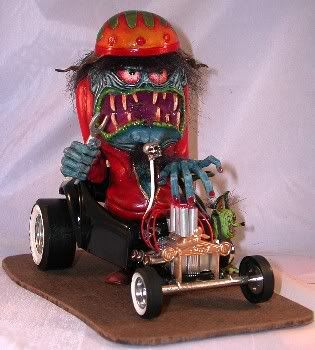
DragNut will be the 9th build in the series of 12 for the Petersen Automotive Museum. I am going to try and finish one of these figures like a painting from artist Keith Ciaramello ...so I am building two and let P.A.M. take their pick.
Here's a list of alterations made so far:
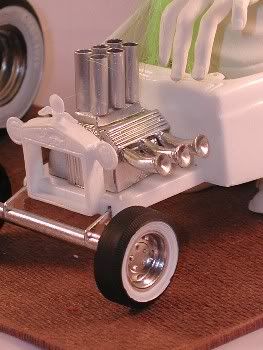
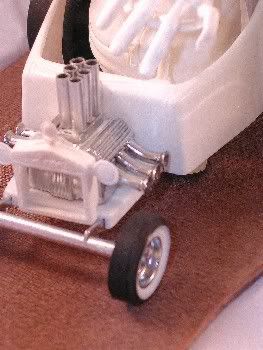
1.) Larger rear wheels were added which made changing the rear hangers to accept the larger axles.
2.) The short air intakes on the engine manifold were removed and larger aluminum stacks were added.
3.) A distributor was fabricated from plastic rod, plastic coated wire, and aluminum tubing. Holes were drilled to accept plug wires.
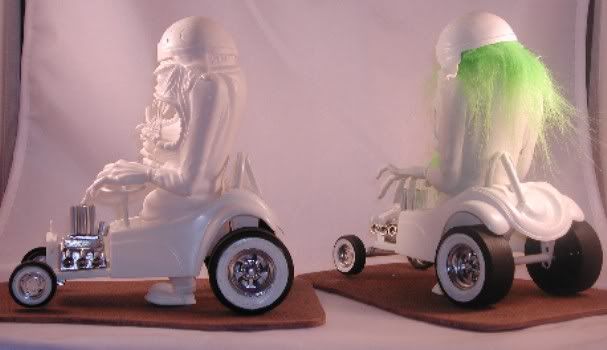
4.) Roll bars were made from plastic tubing and plastic coated wire (as a filler for the tubing).
5.) The chrome pieces were airbrushed with Chrome SPAZTIX airbrush paint ...I like it alot!
More on the way ...Weldon
Last edited by
weldonmc on Tue Jan 26, 2010 1:56 am, edited 1 time in total.
I have been a FINKSTER since 1963. I enjoy building, painting, and restoring all of Roth's Monster models ...Weldon
-
weldonmc
- Posts: 237
- Joined: Sun Feb 06, 2005 8:19 pm
Post
by weldonmc » Thu Jul 23, 2009 2:05 am
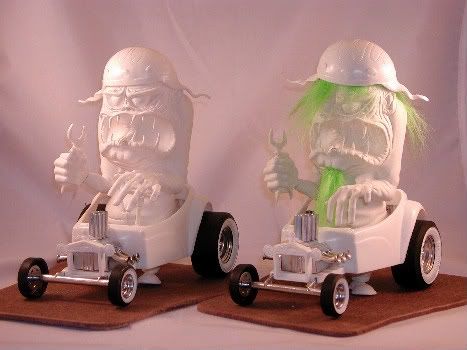
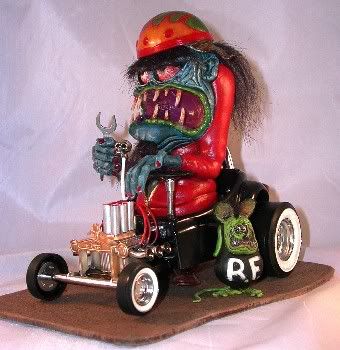
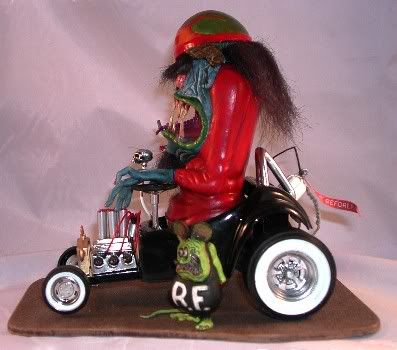
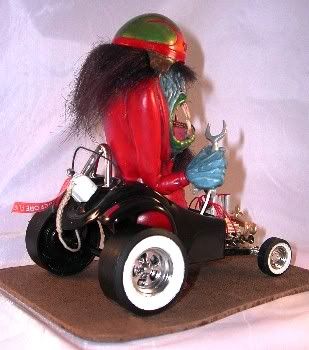
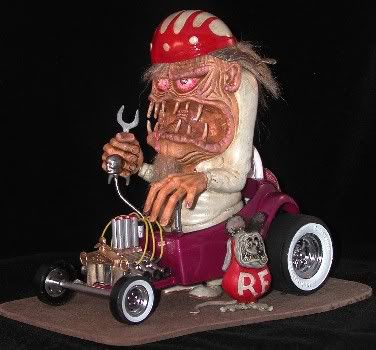
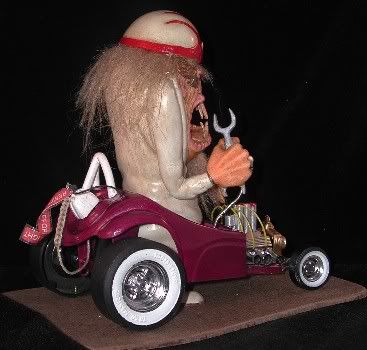
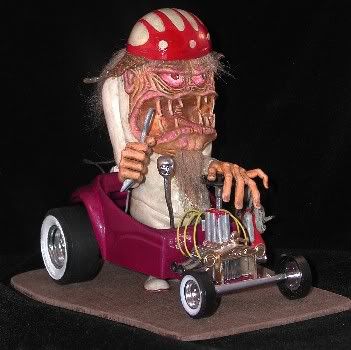
Both of these builds are Roth/Revell DRAGNUT kits. I have been wanting to try to recreate a DragNut painting done by Keith Ciaramello for a few years now and I wasn't sure if I could do his artestry justice so I built two ...The Petersen Automotive Museum in LA will get their choice of either for their Roth collection.
Here's the list of everything I added to and/or changed on these kits:
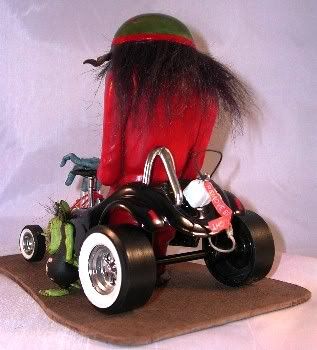
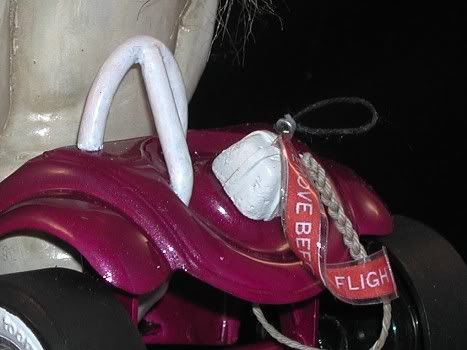
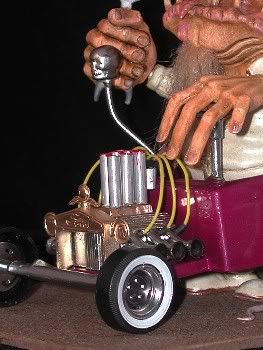
The Bantam bodied car received a roll bar, parachute, parachute chord sleeve, rip chord, "REMOVE BEFORE FLIGHT" flag, shifter with a pewter or a ceramic skull shifter knob, taller aluminum velocity stacks (insides painted red), distributor, plug wires w/ boots on both ends, larger rear tires, axle, and axle tube, lowered front suspension, wide whitewalls front and rear, airbrushed body w/ a catalyzed automotive clear topcoat, Chrome parts airbrushed with Spaztix Chrome. Rear wheels were mounted to the base with two 2x1/2 brass screws.A thick plastic strip was attached to the bottom of the engine allowing it to be mounted to the engine bay with two 2x3/8 brass screws.
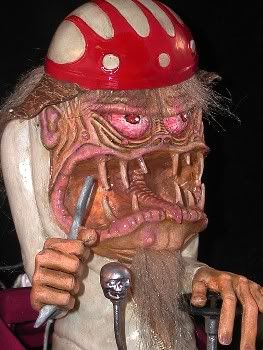
The DragNut figure was assembled, seams filed away with jewelers files, then sprayed with a white enamel primer. Acrylic craft paints were used for color, the helmet was airbrushed w/ a catalyzed automotive clear topcoat. Thin slots were cut into the head front and back just under the bottom edge of the helmet and below the chin to allow strips of craft fur to be pushed through. The helmet is attached with Velcro buttons. The helmet straps were drilled and painted with a "crackle" paint. Thick plastic plates were installed in the bottom of the shoes allowing the figure to be mounted to the base with two 2x1/2 brass screws.
The base is 1/8" masonite made to match the 8 other kit bases. The little Rat Fink has a small hole drilled through the bottom of one foot up through that leg and he slips over a piece of plastic coated wire.

THEY TOOK BOTH OF THEM!
Hope you like them ...Weldon
I have been a FINKSTER since 1963. I enjoy building, painting, and restoring all of Roth's Monster models ...Weldon
