Who could forget those wild Monsters like Wild Child, MrGasser, Junkyard Kid, Mother's Worry, etc...? Share your Monster memories, pictures, toys, models, decals, shirts, etc....
Moderator: weldonmc
-
weldonmc
- Posts: 237
- Joined: Sun Feb 06, 2005 8:19 pm
Post
by weldonmc » Wed Feb 04, 2009 2:49 am
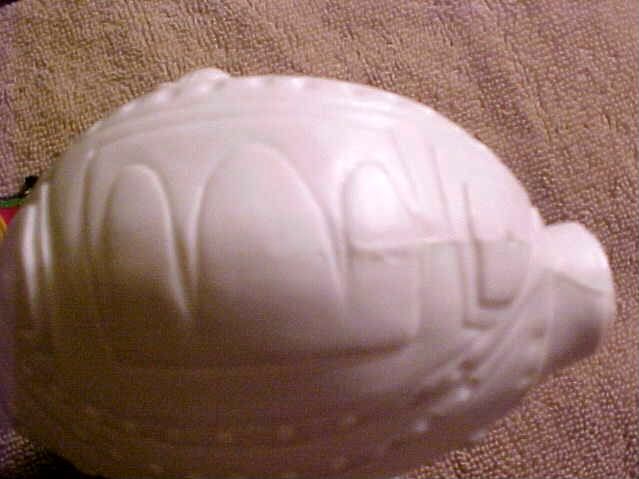
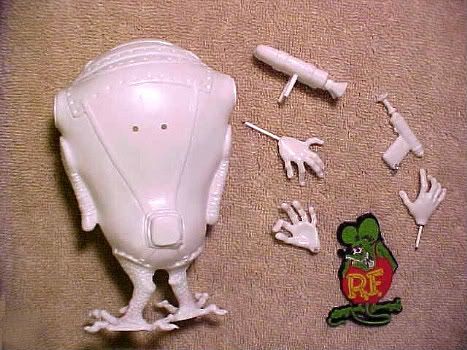
Scuz Fink will be finished in a yellow/green with the space suit airbrushed Pearl Silver and cleared with suspended large Silver Flakes. This build-up will start with the first set of photos showing the body halves glued together. You can see the seam that splits the helmet and the (2) lower arms. The helmet seam has been worked on the left side only so you can see the seam after the (2) halves were joined.
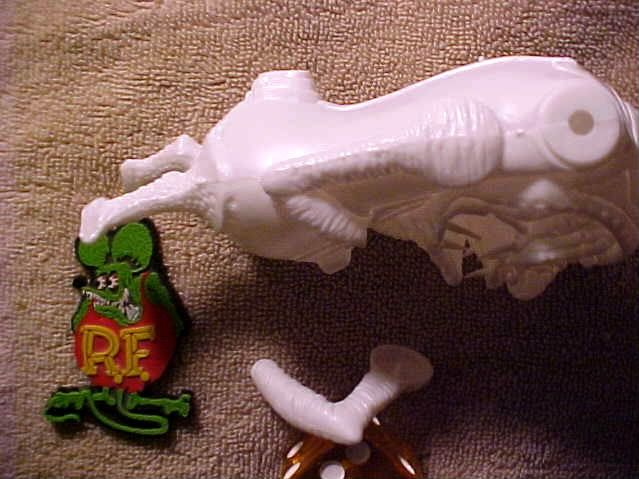
Jewelers files were used to remove the seams and rework the details in the helmet, sleeves, and legs.
After quite a bit of work ...these pieces are set aside for the moment.
Last edited by
weldonmc on Sat Feb 28, 2009 7:55 am, edited 4 times in total.
I have been a FINKSTER since 1963. I enjoy building, painting, and restoring all of Roth's Monster models ...Weldon
-
weldonmc
- Posts: 237
- Joined: Sun Feb 06, 2005 8:19 pm
Post
by weldonmc » Wed Feb 04, 2009 6:47 am
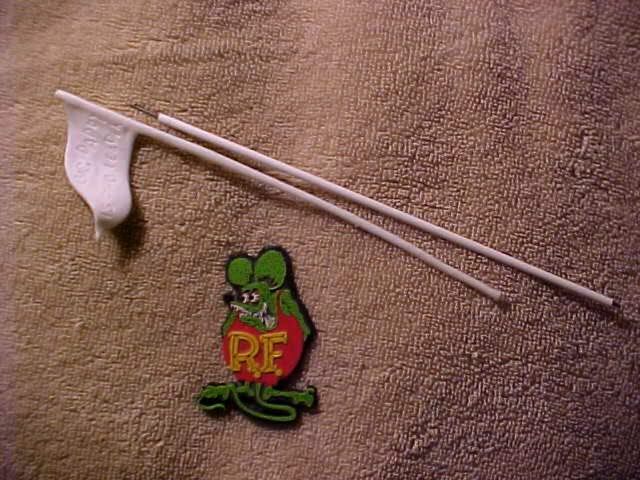
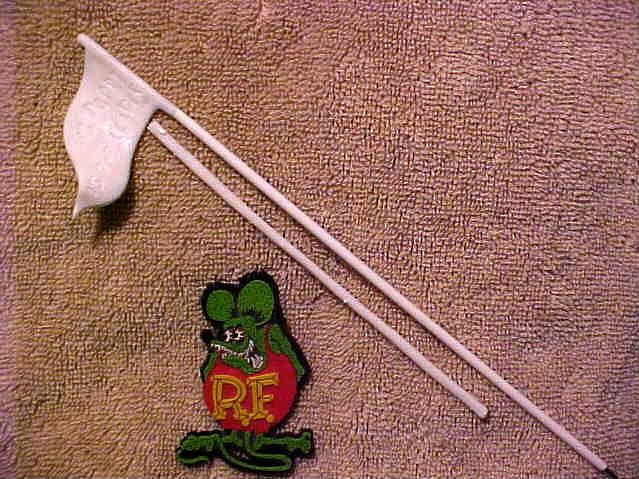
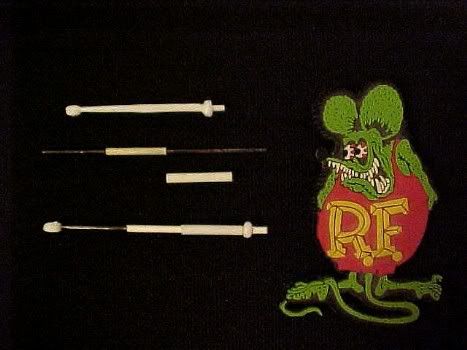
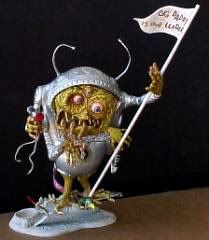
The flag pole is really BAD in this kit ...warped like crazy! The flag portion was removed and a small hole drilled to accept the wire inserted into the plastic tubing. The other end is mated to a matching hole drilled in the Dragonfly's head.
More to come ...Weldon
I have been a FINKSTER since 1963. I enjoy building, painting, and restoring all of Roth's Monster models ...Weldon
-
weldonmc
- Posts: 237
- Joined: Sun Feb 06, 2005 8:19 pm
Post
by weldonmc » Thu Feb 05, 2009 1:07 am
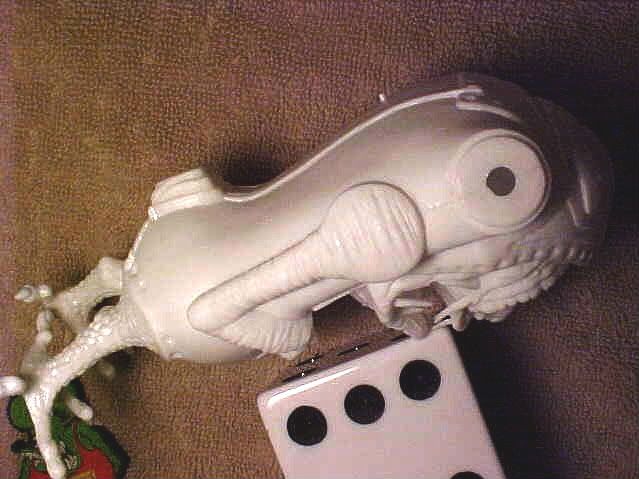
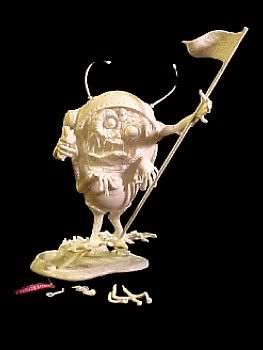
This picture shows some additions and modifications made to the kit.
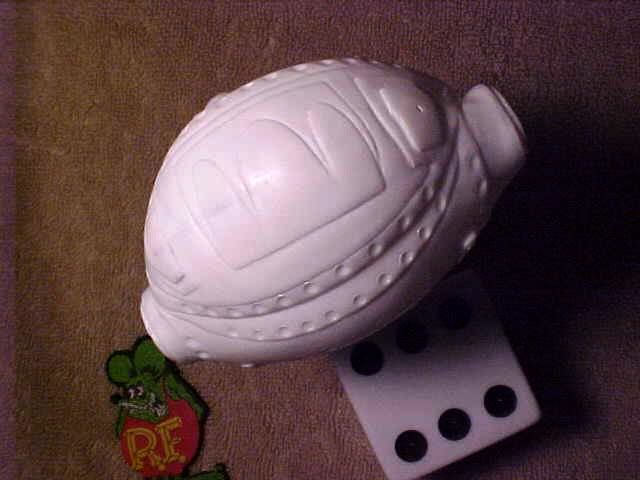
1.) The (2) pins that mount the tanks to the back of SF were removed and holes drilled to accept the (2) .100" plastic rods cemented into the reworked holes of the tanks. The pins in the tanks will press tightly into the back requiring no cement.
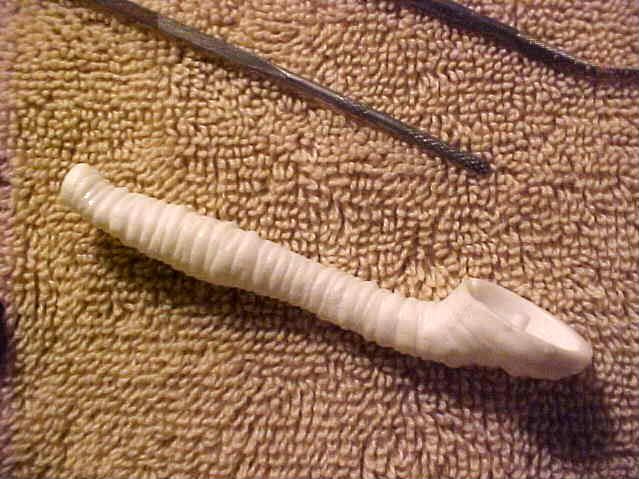
2.)The two upper hands each had two fingers that were molded together ...they were separated with a saw blade and cleaned up with jewelers files.
3.) The lower left hand has a metal pin inserted into the wrist that will match a piece of tubing inserted into the wrist of the lower left arm allowing it to move and be secure without cementing.
4.) Short pieces of plastic coated metal rod were inserted into the upper hands to better secure them to the arms
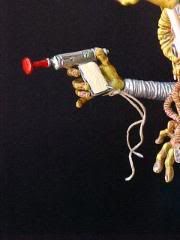
4.) The Ray Gun received a wire ring mounted through the handle to attach "wrist straps".
More to come ...Weldon
I have been a FINKSTER since 1963. I enjoy building, painting, and restoring all of Roth's Monster models ...Weldon
-
weldonmc
- Posts: 237
- Joined: Sun Feb 06, 2005 8:19 pm
Post
by weldonmc » Sat Feb 07, 2009 10:29 pm
In this picture you see the kit antenna at the top. This update shows how anyone can make tapered antennas to replace the straight ones. The next piece down is a piece of 1/16" plastic coated wire that is 2-1/4" long that has had the plastic trimmed away 5/8" from the left side and 1" from the right side leaving 5/8" of the plastic coating. The short piece is a piece of 3/32" plastic tubing that is 5/8" long. Both ends were removed from the kit antenna and drilled to accept the wire. The nib on the bottom of the antenna base was removed and replaced with a sleeve of plastic removed from the 1/16" plastic coated wire. Cement the 3/32" x 5/8" tubing to the wire. The piece is then chucked up to a drill and the plastic is tapered with a file while it is spinning. The new tapered antennas can be bent into any irregular shape and I would recommend bending them around a rod vs using pliers where the plastic is. When finished ...cement both ends and sleeve into place. Open up the holes in the helmet to accept the new antennas.
More to come ...Weldon
I have been a FINKSTER since 1963. I enjoy building, painting, and restoring all of Roth's Monster models ...Weldon
-
weldonmc
- Posts: 237
- Joined: Sun Feb 06, 2005 8:19 pm
Post
by weldonmc » Mon Feb 09, 2009 9:53 pm
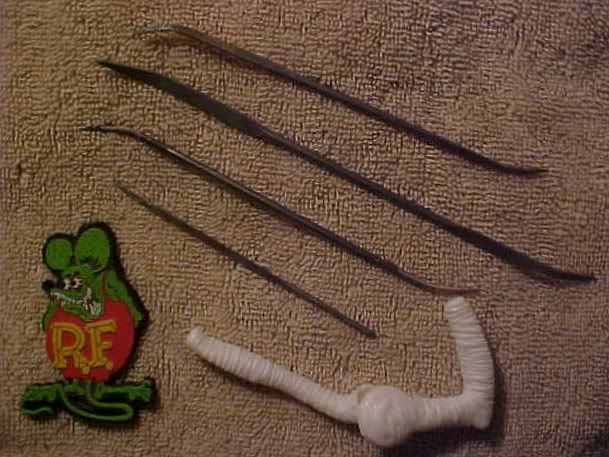
SCUZ FINK is ready for primer and paint. The items laying around the base are: a "REMOVE BEFORE FLIGHT" tag and chute pull, a fish skeleton, and the (3) tongues. Lead weight was also cemented to the back edge of the base for better balance.

More pictures soon ...Weldon
I have been a FINKSTER since 1963. I enjoy building, painting, and restoring all of Roth's Monster models ...Weldon
-
weldonmc
- Posts: 237
- Joined: Sun Feb 06, 2005 8:19 pm
Post
by weldonmc » Tue Feb 10, 2009 2:40 am
Paint plans for this SCUZ FINK: Yellow/Green figure ...more yellow than green, Pearl Silver suit topped with Clear Silver Flake, Alclad Chrome on tanks and antennas ...something like this:
I have been a FINKSTER since 1963. I enjoy building, painting, and restoring all of Roth's Monster models ...Weldon
-
weldonmc
- Posts: 237
- Joined: Sun Feb 06, 2005 8:19 pm
Post
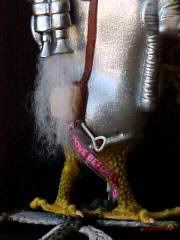
by weldonmc » Sat Feb 21, 2009 12:55 am
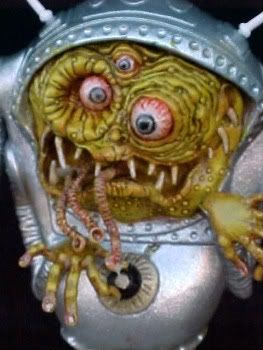
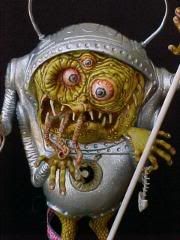
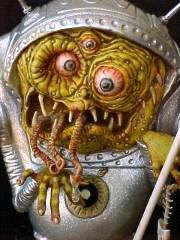
SCUZ FINK's Space Suit was airbrushed with a Pearl Silver , overlayed with a Silver Metalic Flake, then top-coated with a catalysed automotive clear. The figure was brush painted with Geco Green acrylic paint. A Yellow was dry brushed over that to high light the upper details in the palstic ...then a Red Mahahogony oil based stain was applied and wipe off to bring up the lower area details. A coat of Clear Satin Polycrylic was brushed on for protection. The wet look on the eyes, teeth, lips, inner mouth, finger and toenails, was achieved by applying a high gloss fingernail polish.

Almost complete ...more to come ...Weldon
I have been a FINKSTER since 1963. I enjoy building, painting, and restoring all of Roth's Monster models ...Weldon
-
weldonmc
- Posts: 237
- Joined: Sun Feb 06, 2005 8:19 pm
Post
by weldonmc » Mon Feb 23, 2009 8:39 pm
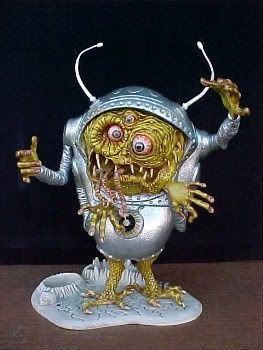
I have a few pictures of the finished SCUZ FINK.
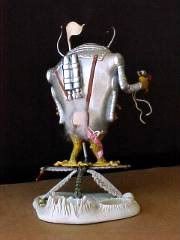
Here is a list of what was done to this kit:
1.)All parts were removed from the sprue and cleaned up with jeweler’s files.
2.) Matching parts were joined together and the seams cleaned up with jeweler’s files. Glazing putty was used where needed to remove all traces of any seam.
3.) Small brass screws were used to attach the figure to the Ding Bat.
4.) Lead weight was attached to the base to counter balance the assembly.
5.) The flag pole was replaced with a longer and straighter plastic coated wire.
6.) Longer, tapered antennas were made from plastic coated wire and plastic tubing.
7.) (3) of the (4) hands were drilled and plastic coated wire inserted for a stronger joint.
8.) The mounting pins for the Jet-Pack were removed, holes drilled and plastic rod inserted …the Jet- Pack is mounted without cement to the back of the suit.
9.)A white enamel primer was used as the base coat.
10.) The “skin” was taped off and an acrylic Pearl Silver was airbrushed on the space suit.
11.) A Clear Metalflake Silver was airbrushed over the Pearl Silver.
12.) A catalyzed automotive Clear was airbrushed for the final top coat.
13.) The tape was removed and these areas were brush painted with an acrylic Geco Green then dry brushed with Yellow to bring out the highlights.
14.) An oil based Mahogany stain was applied to these surfaces and wipe away with cheese cloth highlighting the low area details. A coat of Semi-Gloss Polycrylic was brushed on to protect the paint from rubbing off.
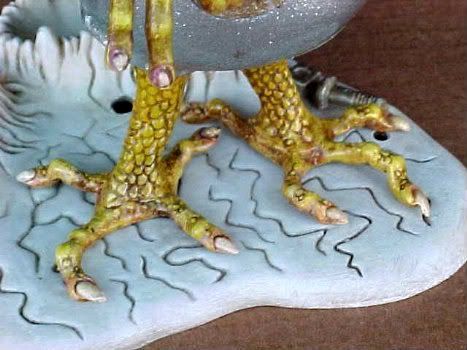
15.) The same procedure was followed on the primered flag and base except an oil base Walnut stain was used.
16.) A chute-pull was made from plastic coated wire to replace the plastic piece and a “REMOVE BEFORE FLIGHT” flag was added. Pulled cobweb material was stuffed into the exhausts of the Jet-Pack to simulate Vapor.
17.) The handles on the Ray Gun were painted with an Ivory color. A hole was drilled and a wire ring made to attach the waxed chord Wrist Straps.
18.) A High Gloss nail polish was used on the eyes, teeth, tongues, inner mouth, lips, finger and toenails.
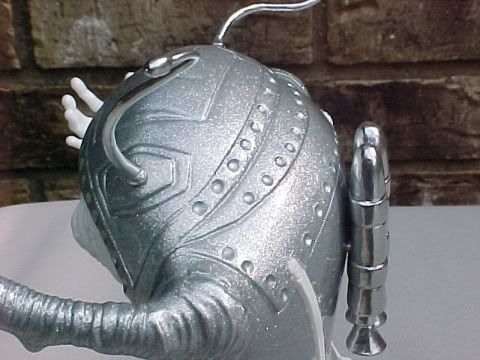
19.) The antennas, Ray Gun, and Jet-Pack were airbrushed with Alclad Chrome.
Hope you like him ...I think Superfink will be the next one ...Weldon
I have been a FINKSTER since 1963. I enjoy building, painting, and restoring all of Roth's Monster models ...Weldon
